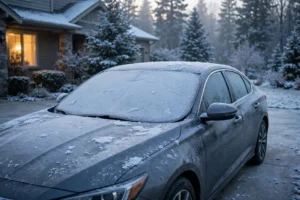

When to Switch to Winter Tires (and How to Read a Tire Sidewall)
October on Long Island means one thing for drivers: winter tire season is here. That first stretch of cold mornings is your reminder — tires are the only part of your car that touches the road, and the right rubber in the right season is the single biggest safety upgrade you can make. Here’s how shop owners and DIYers time the swap, decode what’s stamped on a sidewall, and gear up for the cold months.
When Should You Switch to Winter Tires?
Forget the calendar — watch the thermometer. Tire engineers use the 45°F (7°C) rule: below about 45 degrees, the rubber compound in all-season tires starts to harden and lose grip, while winter tire compounds stay soft and pliable. On Long Island, overnight lows start flirting with that line in late October and settle in by November.
Swapping a little early is harmless; running winter tires deep into summer is not — the soft compound wears fast on hot pavement. If you drive through a real Northeast winter, a dedicated winter set isn’t optional equipment, it’s the difference between stopping and sliding.
How to Read a Tire Sidewall
Every tire carries its full spec sheet in raised letters on the sidewall. Take a common size — P215/65R16 98H — and decode it left to right:
- P — passenger vehicle tire (LT means light truck).
- 215 — section width in millimeters, sidewall to sidewall.
- 65 — aspect ratio: the sidewall height is 65% of the width.
- R — radial construction (virtually all modern tires).
- 16 — wheel diameter in inches.
- 98 — load index: how much weight each tire can carry. Match or exceed your vehicle’s requirement — consult your owner’s manual or the placard on the driver’s door jamb.
- H — speed rating: the maximum sustained speed the tire is rated for. Never go below your vehicle’s specified rating.
Two more markings matter for winter shopping. The mountain-snowflake (3PMSF) symbol means the tire passed a standardized severe-snow traction test — that’s a true winter tire. “M+S” (mud and snow) is a tread-pattern designation, not a performance test, and doesn’t guarantee real winter grip. And check the DOT date code: the last four digits are the week and year the tire was made (e.g., 2324 = week 23 of 2024). Tires older than about six years deserve a professional inspection even if the tread looks fine.
Winter vs. All-Season: What’s the Difference?
It comes down to compound and tread. Winter tires use a softer rubber that stays flexible in the cold, plus dense siping — the tiny slits in the tread blocks that bite into snow and ice. All-seasons split the difference for year-round convenience but give up real cold-weather grip. Braking distances on packed snow can be dramatically longer on all-seasons; that’s the trade you’re making. All-weather tires (with the snowflake symbol) are a reasonable middle ground for milder winters, but in a real Northeast winter, dedicated winters still win.
What You’ll Need
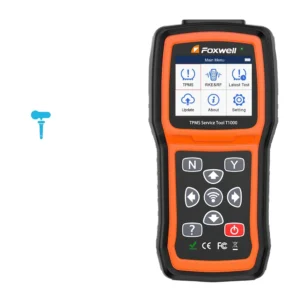
2025 Foxwell T1000 TPMS Diagnostic Tool — $132.99
Swap to winter wheels without the dash-light headache — the Foxwell T1000 activates and programs TPMS sensors and runs the relearn so your car recognizes the second set.
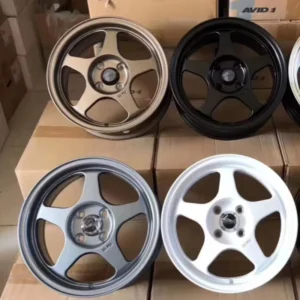
Jy Casting Rims 15×6.5 Alloy Wheels (4×100/108) — $82.99
A dedicated set of winter wheels turns the seasonal swap into a quick driveway job instead of a mount-and-balance appointment every fall.
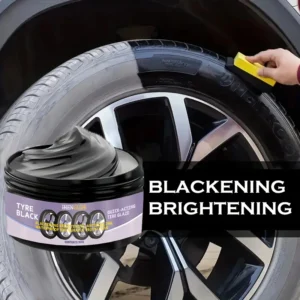
Tire Polishing Protective Paste, 100g — $14.99
Dress the winter set before it goes on — long-lasting gloss and protection against salt and slush grime.
Beyond that: a floor jack and a pair of jack stands, a lug wrench or impact gun, and your owner’s manual for the correct lug nut torque spec. Never work under a vehicle supported by a jack alone — jack stands, always.
Swapping Your Wheels: The Safe Way
- Park on flat, solid ground and chock the wheels that stay on the ground. Loosen each lug nut about a half turn before lifting.
- Jack up one corner at a time at the factory lift point and set a jack stand. Give the vehicle a firm shake — if it moves, reset and retry.
- Remove the wheel and set the winter wheel on the hub. Hand-start every lug nut before tightening anything — cross-threading is how studs die.
- Snug the lugs in a star pattern, lower the vehicle, then torque to your manual’s spec in the same star pattern.
- Re-torque after about 50 miles of driving. Lugs can settle as the wheel seats.
- Relearn the TPMS. Swapping to a second set of wheels usually means a second set of sensors — your dash light will need a relearn so the car recognizes them. A TPMS tool like the Foxwell T1000 above makes this a five-minute job instead of a trip to the shop.
- Check pressures cold. Tire pressure drops roughly 1 PSI for every 10°F of temperature drop — the first cold snap of the season is when underinflation sneaks up on you. Check monthly through winter.
Keep the Winter Set Looking Sharp
Road salt and slush are brutal on rubber and wheels. A quick wipe-down and a coat of tire dressing when you swap keeps the winter set from aging prematurely — and your car looking cared-for all season long.
Gear Up at DAutoHaus
Whether you’re a shop running seasonal changeovers all October or a driveway DIYer doing your own swap, DAutoHaus has what the job takes: winter-ready tires by size with free shipping, TPMS tools, wheels, and the care products that keep them looking new. Questions about fitment? Call or text us at (631) 800-9911 — we’re right here on Long Island.
DAutoHaus — your shop supply source. Long Island, NY. dautohaus.com — (631) 800-9911.